jicc logo
  • Design
  • Before & Afters
  • About
  • Press
  • Services
  • A Little Bit About Us

    tara-and-percy

    Jersey Ice Cream Co was founded in the summer of 2010. Two kids in love found an old embossing stamp at a flea market, dreamed up a design empire, and then set to work trying to create it. Today Tara Mangini and Percy Bright spend their time moving house to house, job to job, leaving beautiful homes in their wake. They believe in craftsmanship, timelessness, and leaving things better than they found them. They do not make ice cream, but will happily have some if you’re offering.

    Jerseyicecreamco@gmail.com

Throwback THURSDAY: The Paneled Living Room

April 25, 2013 by Percy Bright 4 Comments

519-frontroom2
We’re unbelievably bad at documenting our work. At photographing before, during, and after projects. At posting those scant photos for the world to see.

We tend to do all the documenting in huge bursts, which–believe me–is not the best way to do it. It always means faking “during” shots, re-cleaning and re-styling for after photos, and getting so frustrated that we didn’t take more befores. Two great rules we need to start following: 1. Clean as you go. 2. Photograph as you go.

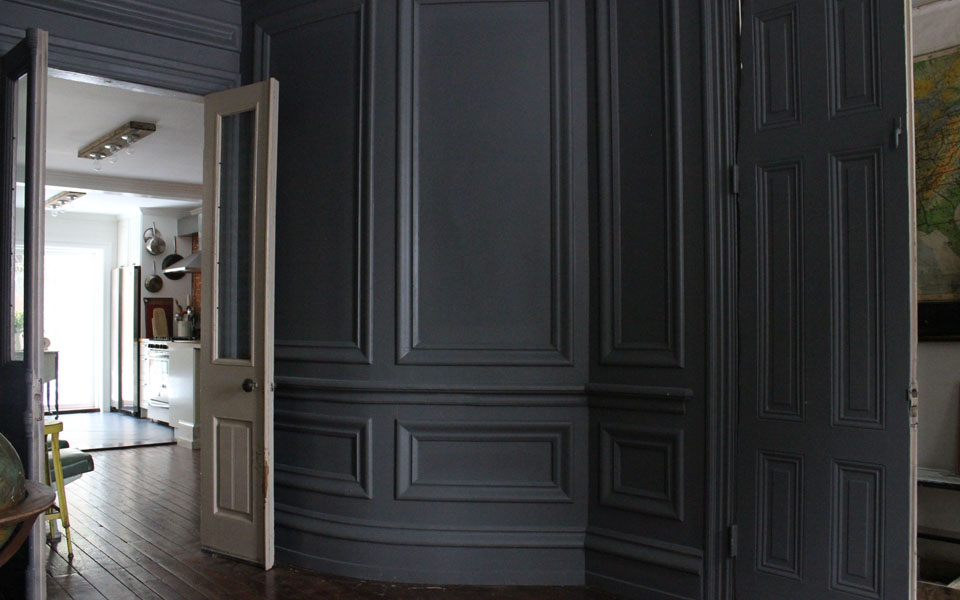
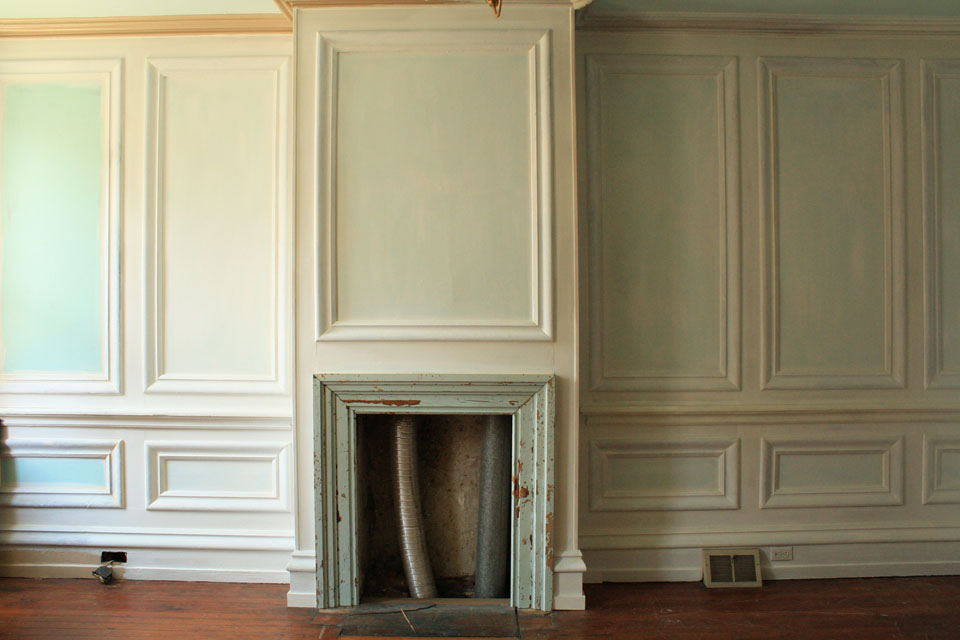
Anyway, here’s a project from a couple years ago! My personal favorite actually, and one that we did manage to photograph while it was happening. And thank god we did. I don’t know exactly how many hours it took altogether, but I’d guess at least a hundred. I still can’t believe it’s done. And that I did it. Everything from pulling hundreds of feet of thick old oak basecap molding (yes, oak!) out of an abandoned school in North Philly to spraying on the final coat of paint. None of it was easy, but the final result was worth every second. I doubt most visitors even realize that molding hasn’t always been there.

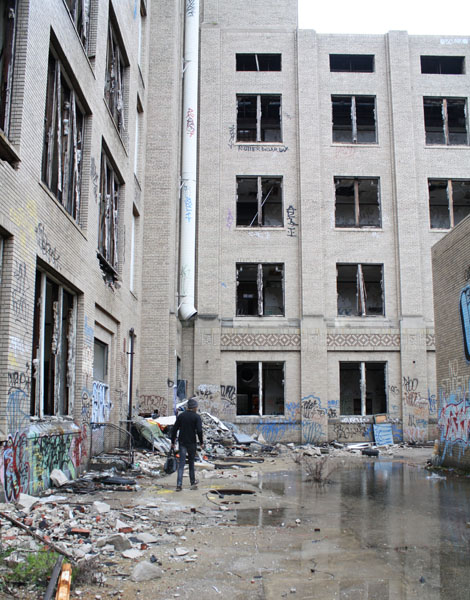
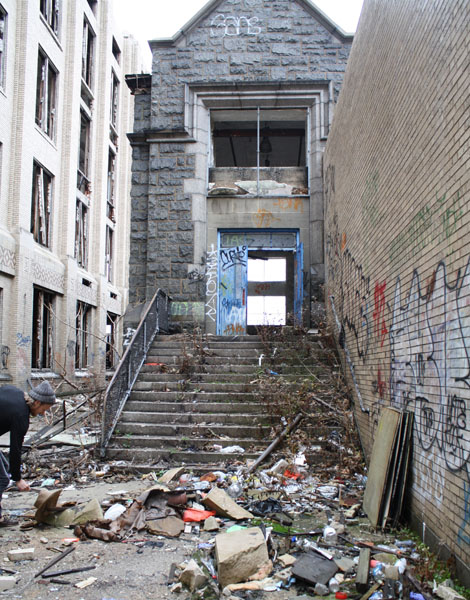
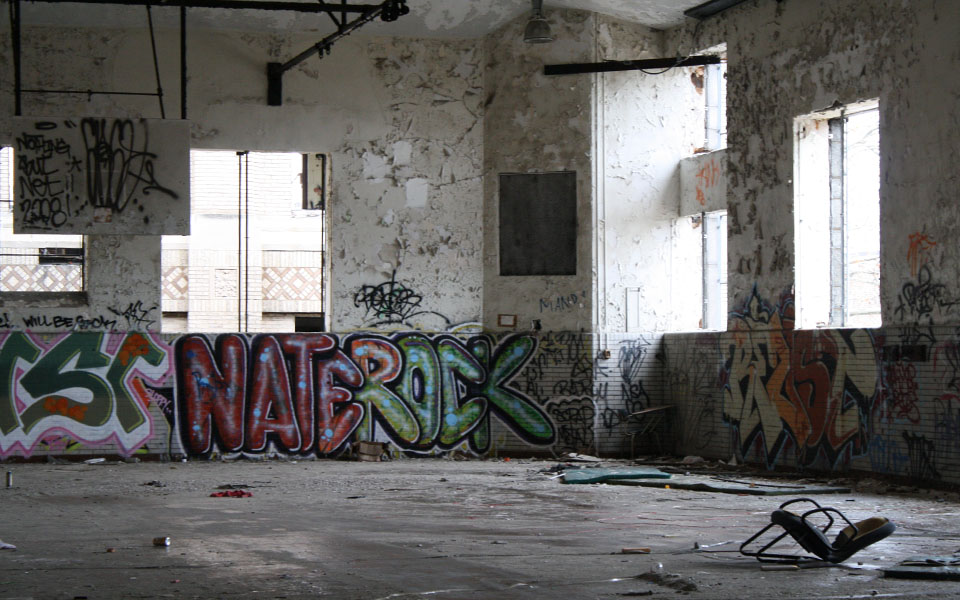
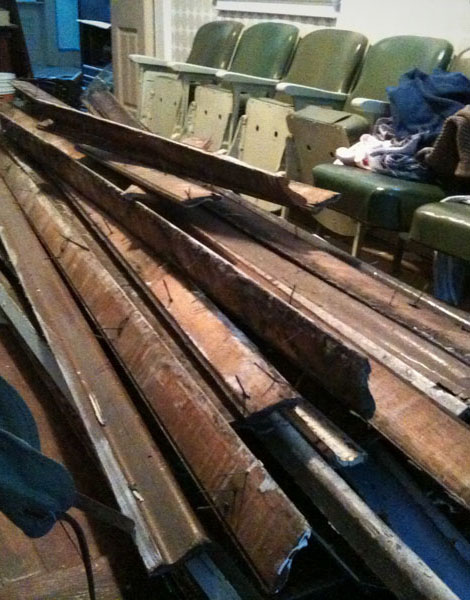
The first step was salvaging all the wood, which I did solo one snowy winter day a couple years ago. A friend of a friend had shown me this amazing abandoned school in North Philly. It had been sitting for years, slowly falling to ruin at the hands of kids, scrappers, and the weather. It was slated for demolition any day (but actually took another year or two), so I didn’t feel too bad about trying to preserve some of the unbelievable craftsmanship that had gone into building the place. (School photos from a different mission on a different day, thanks to Hilly Cribben!)

IMG_6453
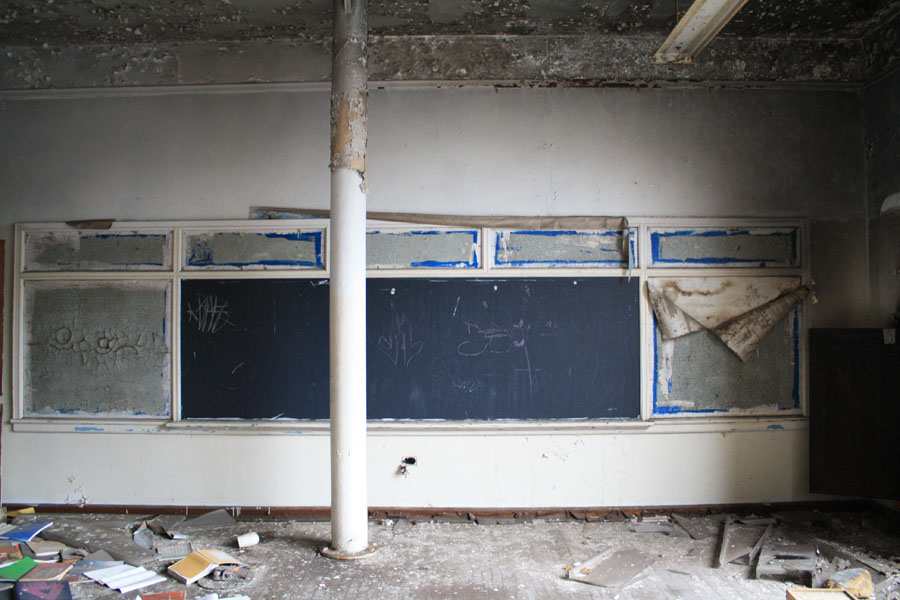
It’s not easy to salvage around four hundred linear feet of molding, let alone singlehandedly. Pulling it off’s just the first step. A lot of hallways and rooms like this one were left cap-less that day.

After I reached my linear foot goal, I had to haul all the pieces down a few hallways and stairs, across a courtyard, up a few more stairs in the gymnasium, and out one of the former windows. Defenestrated, the molding would land in the quickly accumulating snow about fifteen feet below, ready for me to circle back and pick it up in the clean black minivan I’d rented for the day.

IMG_6477 IMG_6478

IMG_6490

IMG_6496
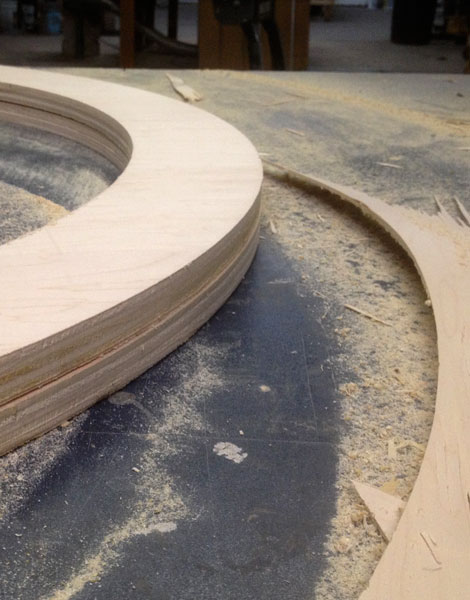
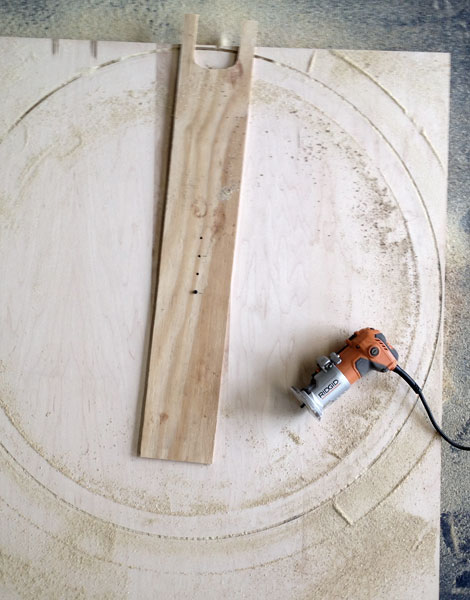
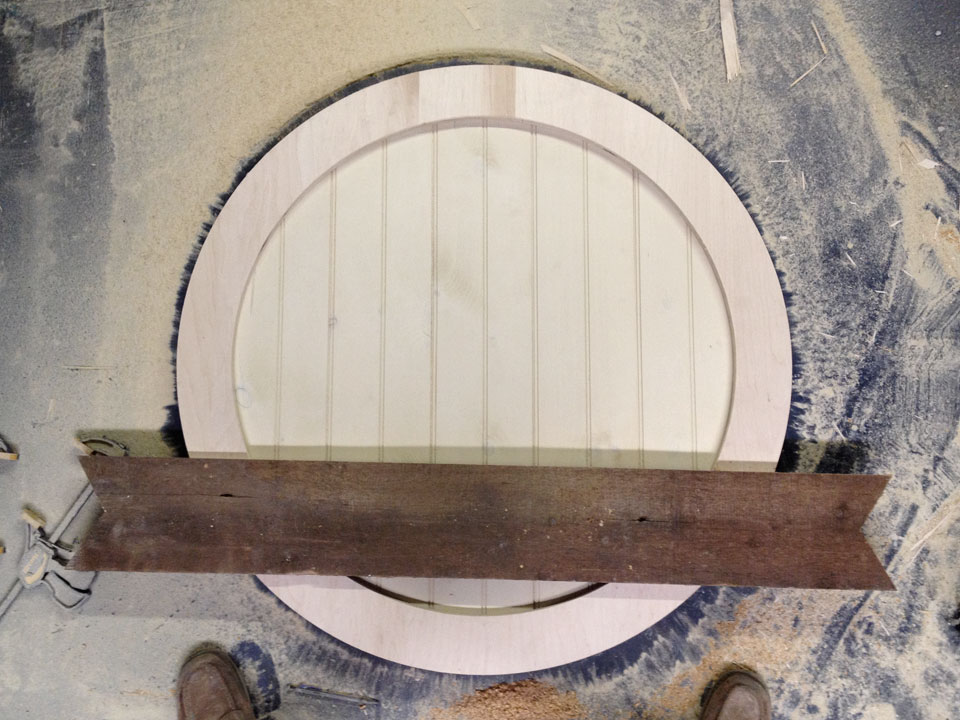
After all that, at the end of a very long day, the wood ended up in the dining room, ready for action. If you ever need extra motivation to get a project done, just pile up the supplies in your dining room to the point that you can barely walk past, especially if your supplies still need to be denailed. You’ll be dying to finish before you’ve even started! And just like that, the room quickly started coming together.

IMG_0928 IMG_0945

IMG_0953 IMG_1045

IMG_7808
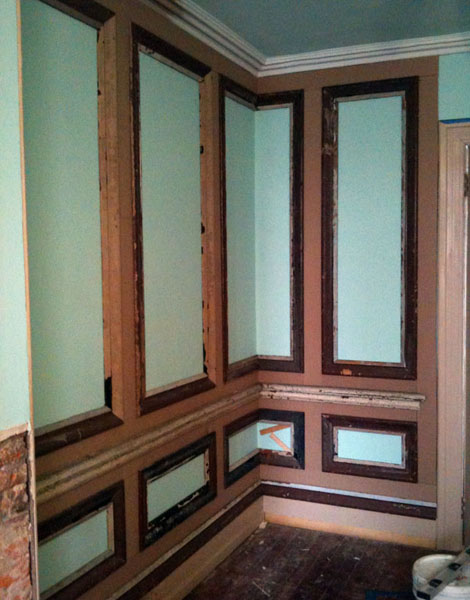
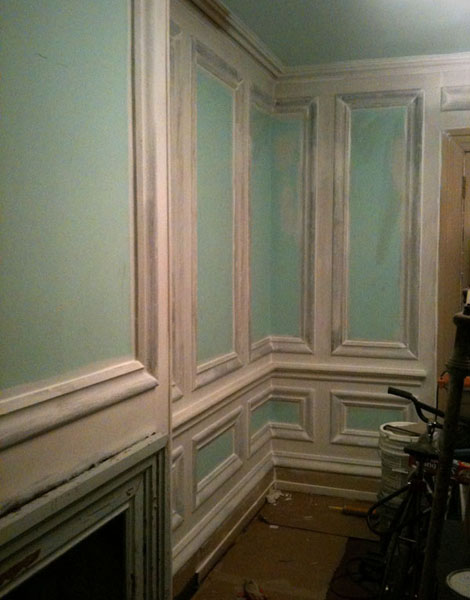
We loved how the molding looked primed and for just a second thought about painting it light. But that felt a little too high tea to me, so we went bold!

IMG_2254

IMG_3976

Filed Under: before and after, design, reclaimed wood Tagged With: before & after, behind the scenes, DIY, salvage

CUTTING a PERFECT CIRCLE

April 9, 2013 by Percy Bright Leave a Comment

IMG_2896
We’re pumped to announce that yesterday we put the finishing touches on the second Bryn & Dane’s location! (For a few pictures from the facelift we gave the first location, click here.)

Oh, and you’re all invited to the big launch party this Thursday from 5-8pm at 400 Horsham Road! Get ready for some awesome local food, beer, and healthy cocktails. Plus you’ll get to see the finished sign and the rest of the new space, which we decked out with tons of beautiful reclaimed wood we literally pulled off the side of a barn up in Phillipsburg NJ. If you aren’t able to make it Thursday, keep checking back here for photos of the new space and the barn where we sourced all the beautiful wood.

On to the circle cutting!

You could obviously trace out a perfect circle in pencil, then do your best with a sure hand, a steady eye, and a jig or band saw. But it’ll never be perfect that way.

Cutting a perfect circle really isn’t as hard as it sounds. Especially if you have a Rockler circle cutting jig and a nice router. You don’t? Me neither. Lucky for us, even a scrap of wood, a single screw, and a crappy little palm router will do the trick, though you might find your router smoking and burnt out by the end if you’ve constantly pushed it too hard.

Here’s what you do: Find yourself a long enough scrap and notch out one end so your router fits snugly. At the other end, drill a hole a little wider than your screw. The distance between screw hole and router notch out (adding in the extra distance to the router bit, about 1.5 inches on a palm router) will be the radius of the final circle, so plan accordingly! Fire your screw in and go to town, increasing the depth of your cut just a little on each pass so your router doesn’t suffer the same fate as mine.

Voila! Now stay tuned for the finished sign. She’s a real beaut.

IMG_2897IMG_2894

IMG_2900

IMG_2901

Filed Under: design Tagged With: behind the scenes, DIY, how to

FREE Five-Minute FRAMES

March 22, 2013 by Percy Bright 2 Comments

IMG_9014
More than one person thought I’d lost it when I started cladding a bedroom wall with lath I’d saved after pulling down a dividing wall between my dining room and kitchen. But even before I’d finished, I knew I was in love. That was almost four years ago. (Yikes!) Ever since then I’ve found it impossible to pass a city dumpster without peering inside. Usually I’ll see nothing but rubbish. Every once in a while, though, I’ll come upon a few bundles of lath and maybe even some old tongue-and-groove flooring or joists or studs with stripes running down the side where plaster made it through the gaps in the lath. Pure history and possibility.

When you need to work some magic on a tight budget, it doesn’t get any better than free. Today we managed to whip together three wall hangings for around five dollars total. That includes the botany charts, from a set of thirty we scored at Brimfield last year for next to nothing. Oh, and it only took about five minutes.

First we cut the lath to length–four strips per chart, two on top and two on bottom–allowing for a slight overhang on either side. Then we stapled the tops and bottoms of each chart to the front strips of lath from behind, before lining up the back strips of lath and securing them to the front strips with 1/2″ screws, charts sandwiched in between. One hanger per chart and voila!

IMG_9020

Filed Under: DIY Tagged With: DIY

Sign Up for Our Newsletter:

Copyright © 2025 · Jersey Ice Cream Co. · All Rights Reserved. · Site by Inbound Found · Branding by Bueno